Paper Prototyping with Magnets and Dry Erase
Paper Prototyping with Magnets and Dry Erase
What is Paper Prototyping?
Paper Prototyping is a low fidelity (Low-Fi) way to create and test designs before an application has been built. The nature of a these prototypes as paper and pencil is an important element. Not only does the paper and pen lead to a creative aspect of the process, but it also lends well to a cheap budget and quick turnaround. More importantly however, the rough sketch implies an unfinished idea which lends well to iterations and makes it more likely that those working on the design will be willing to change them. The more time and effort we put into an idea, typically the more attached we become to that idea. By creating rough sketches with just enough fidelity to get the idea across we are more likely to be open to modifications.
Why use Low-Fi Prototyping?
Paper prototyping provides designers and developers a way to visually hash out requirements before any time or money goes into developing the product. This is important to ensure that the time spent coding is used efficiently both in resource time and in budget. It also ensures that what is being built has been considered pre-production. The design has been collaborated on, iterated and agreed upon before being built. This can help to eliminate costly time spent recoding parts of the application that weren’t built to stakeholder expectations because of miscommunication, or ideas that didn’t carry out as planned in ideation.
How does it work?
These designs should be created in a group setting to ensure many different members of the team have input into the process. This works as a sort of brain storming of the interface. The designs can then be posted, voted on and iterated. Then the top designs should be tested. Ideally this should be done with participants outside of the organization who will use the product.
This feedback can be taken and incorporated into another set of designs which can start to move up the ladder of fidelity as functionality and features are validated.
Variations
While paper is the traditional medium used, there are many other forms of low fidelity prototyping that serve the same purpose. For example instead of sketching some will print and make cut-outs of various interface elements. Then tape those elements to another piece of paper so they can be easily adjusted.
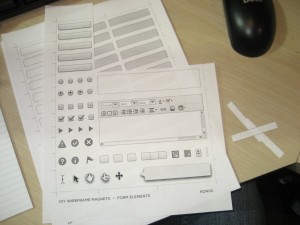
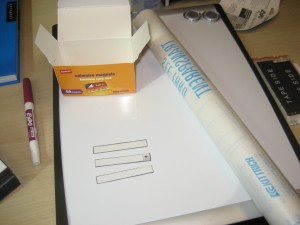
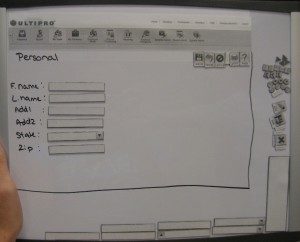
Another similar option that still allows for easy modification are magnets and magnetized dry erase board. By making stencils of common elements and printing them out on magnetic paper, or gluing them to magnets these elements can then be quickly moved around on a whiteboard to create many different designs. Laminating these magnets then opens the prototype to be fully used with whiteboard markers. This allows users to write in responses where typing would take palce. Moderators can also quickly write in titles and other important changing elements.
This type of testing can be captured with a camcorder for later discussion and analysis, or pictures can be taken of each “page” and uploaded to a computer.
Konigi.com provides a magnet kit in their tools section (http://konigi.com/tools/wireframe-magnets-diy-kit) that can be used to get you started.
Below are some pictures of a Magnetic/Whiteboard prototype area we setup in our user experience team.
Resources:
- Interactions Magazine March + April 2008: Pencils Before Pixels – A Primer in Hand-Generated Sketching by: Mark Baskinger.
- What do Prototypes Prototype? By: Stephanie Houde and Charles Hill. Apple Computers, Inc.
- Paper Prototyping http://www.paperprototyping.com/
- Paper Prototyping by Shawn Medero http://www.alistapart.com/articles/paperprototyping/


